Showing posts with label tips. Show all posts

Monday, 19 January 2015

What's the difference? - Mod Podge, PVA & Decopatch Glue

The other day I was asked the question 'What is the difference between Mod Podge, PVA and Decopatch Glue?'. So this weekend I decided to test them. Now I use all of these glues for different projects and after reading up on it I've realised that it is quite a lot to do with personal preference as to which glue you use, but I thought I would do a little run down of my findings and let you know my opinion in the hope it might help some people choose which glue to use.

I used:
Mini Paper Mache Boxes
Red Decopatch Papers
Matte Mod Podge
Gloss Mod Podge
Decopatch Glossy Glue
PVA Glue

This is what the boxes look like to start:


And this is how they looked once they were covered and dry.


Matte Mod Podge


This was the first time I had tried the Matte Mod Podge and I am very impressed with the outcome. It has a definite matte finish and looks completely different from the other 3. If you are after a smooth non shiny finish then this is the one to use.


Gloss Mod Podge


I have used gloss Mod Podge quite a few times before but I normally use it when glittering items (such as glasses) and haven't used it for decopatching before. I found that it is a very similar finish to the Decopatch glue. It is glossy and shiny but I can see the brush strokes, although this could have been down to the paintbrush I was using.

I have heard that quite a lot of people are put off of using Mod Podge for this type of project because it can feel tacky to the touch even after it has dried. Now on this box I haven't found that at all but I have in the past use it to coat some paper beads I made and after several coats I have found that they do seem to have stayed tacky, so it could be how thick you layer the glue. This is where the personal preference comes into it, depending what project you are doing.

Decopatch Glossy Glue


This is the glue that I normally use for this sort of project. I have decopatched a small paper mache horse, some shelving and some Christmas decorations and have always used this glue. Now after doing this I see very little difference to the gloss Mod Podge. It is glossy and shiny but again I can see the brush strokes. Decopatch glue is slightly runnier than Mod Podge but is non toxic and has less of an odour so is better for using with children. The one difference I can feel is that it seems to be a harder coating but this could be down to the different shapes of the boxes. I will probably continue to use Decopatch glue for this type of project because of the potential for the Mod Podge to stay tacky if you use too thick a coating.

PVA Glue 


I normally use neat PVA for sticking down embellishments and papers and I use it a lot when making mini books to ensure that my papers are well stuck to my covers. For this project I used it watered down as it was too thick to use straight from the bottle for decopatching. Again how much you water it down comes down to personal preference but I have seen the ratio of 2/3 glue to 1/3 water. This box is not as glossy and shiny as the Decopatch and Mod Podge but not as matte as the matte Mod Podge. Again some people find that PVA can stay tacky depending how much you have used. On this box I found that the lid was not always easy to remove but this could be due to the shape. If you are looking for a cheap alternative to the other glues then this would suffice but just isn't quite so glossy.

I have seen people suggesting that if you add a few drops of a water based varnish to the water/glue mixture that it makes it more glossy and like Mod Podge, this is maybe something to experiment with.

Conclusion
My final conclusion is that there is not a massive difference between them (except the Matte Mod Podge!) and if one works for you then there isn't really a need for you to purchase another. But if you are like me then you have your preferences for each glue for different projects. I will still continue to use the Decopatch glue for decopatching (or the Matte Mod Podge if I want a matte finish), the PVA for mini books and the Mod Podge for glittering things. But if I ran out of Decopatch glue and had the urge to decopatch something then I know I could still use Gloss Mod Podge or PVA as an alternative.

I hope that this has given you some idea as to the differences between the glues and what you might use them for in the future.

Happy Crafting,
Maxine x

Tuesday, 10 September 2013

Getting started with Candle Making

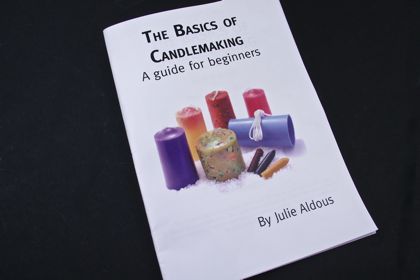
Here at Creative Hobby Supplies we stock a range of supplies and kits for making your own candles. If you want to have a go but aren't sure where to start then this little guide is for you! We also stock a booklet 'The Basics of Candlemaking' A guide for beginners, which goes into more detail.


Supplies:
Wax - We stock both Paraffin and Soy wax. Both can be used to create your own candles. Soy wax is a softer wax and has a lower melting point than paraffin. Our soy wax is a container blend so can only be used if you are making candles in a container such as teacup candles. Paraffin wax needs to have Stearin added to it at the point of melting, normally at 10% stearin to wax. Stearin is added to the wax to help it harden, increase the depth of colour, reduce dripping and improve burning. If you are using a rubber mould then do not use stearin, Vybar must be added instead at 2% because stearin would rot the rubber mould.


Wick - This is available at different sizes depending on the diameter of your mould. So if your mould measures 64mm diameter then you use a 64mm wick!

Moulds - We stock a range of rigid plastic moulds that can be used along with the paraffin wax. You can also use containers such as teacups to make container candles.


Colour - We have a whole range of coloured dye blocks. These are concentrated dye which will colour your candles. Use a little at a time until you have achieved the desired colour. It's not easy to see what the colour will be like while the wax is still liquid so a little tip is so drop a little of the wax onto some white paper, once hardened you will be able to see the finished result.

Fragrance - Candle fragrance is available in both solid and liquid form. We only stock the solid fragrance for ease of display. To use this simple add in small amounts to your liquid wax. Our solid fragrance blocks are marked into 8 sections, the manufacturers guide is 1/8th strip of the block to 900g wax. This can be increased to suit your own requirements. Suitable in both paraffin and soy wax. 


Useful tips

A super simple way to work out how much wax you need for your container is to fill the container with water. Pour this into a measuring jug, however many mls of water fit into the container is approx how many grames of wax you need to use!

If using soy wax you can melt this in a plastic jug in the microwave. Melt on 30second - 1 minute bursts to insure you do not over do it! Let the wax cool a little before pouring.

When you add the colour and fragrance ensure that you thoroughly stir the wax to ensure that it is distributed throughout the wax evenly.

Paraffin wax needs to be melted in a double boiler. Simply use 2 old saucepans, fill the larger one with water and put the smaller one on top with the wax inside. Never melt wax directly on the heat source as it is highly flammable!

Always cut your wick to longer than is needed. When using a plastic mould thread through the bottom and knot it (this will become the top), make sure you leave about 25mm protruding. Seal the hole with some mould seal. Using a wick stick across the open end of the mould tie the wick to it so that is it straight but not too tight. You are now ready to pour your wax.

When making a container candle you will need some metal wick sustainers/holders and ideally pre waxed wick. You can make your own waxed wick by dipping the wick in some molton wax and then leaving to dry on some greaseproof paper.
Sustainers are used to secure the wick in the bottom of candle moulds and glasses where there is no wicking hole. Use with small to medium size wicks and crimp the neck closed with small pliers to hold the wick firmly. The sustainer can be secured centrally in the bottom of your mould using glue dots or a glue gun.


You may find that the wax dips and cracks in the middle. This is simply because wax shrinks as it cools. This isn't a problem you can simply keep a little extra wax by and repour a layer on the top or if you have a heat gun then you can simply give the top of the wax a quick blast which will sort it out! 

If you decide to use liquid fragrance in your candles then the suggested rate is 5-8% of the total amount of wax.

We also stock 2 candle making kits, a basic kit and an ultimate kit. They can be found on the website here.


I hope that this has given you a little look into candle making and has answered some questions or given you the push to give it a go. If you have any further questions please feel free to ask and I will answer if I am able. 

Happy Candle Making!
~ Maxine