
You will need:
Memory Wire coils
Beads
Memory wire cutters/heavy-duty cutters
Round nosed pliers

Memory wire is a steel spring wire. It retains its curved
shape so all you have to do is thread on your beads and secure the ends. It is
a very hard wire so requires Memory wire cutters or any heavy-duty cutters,
your normal jewellery wire cutters will not be strong enough and will get
damaged if you try to use them!
The wire expands to fit the wrist, so bracelets made with
it have a "one size fits all" quality.
1. Bend
a loop in one end. Start by bending about 1/2 inch at one end to 90 degrees.
Memory wire is very stiff and hard; so don't be afraid to use some muscle!


2. Position
the round nose pliers at the end of the wire, and roll the wire into the start
of a loop. Reposition the round nose pliers down at the bottom of the loop and
continue to curl the wire around into a full loop.

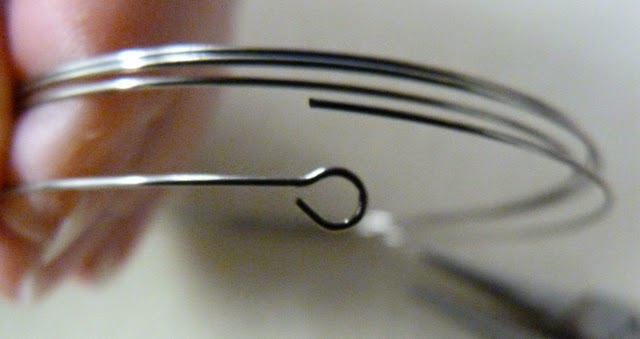
Continue
to tighten the loop until you have a full loop that will stop beads from
sliding off.
3.
Start threading on your beads!
4. Make
sure you slide all the beads to the end and there are no gaps. Use your cutters
to cut down the wire to the correct size. Bend a loop in the end, same as you
did in the beginning. You
may need to adjust the size of the loop to get the tension right.
5. Congratulations you have now finished your bracelet!

Happy Crafting,
Maxine xx
No comments:
Post a Comment