Showing posts with label New Products. Show all posts

Tuesday, 28 April 2015

Never Ending Card Tutorial

Today we are making another type of card, this time a never-ending card! These cards are so fascinating and fun for all ages. The actual construction of the card is much simpler than you might think.


You will need:
-         2 pieces of cardstock
-         Adhesive
-         Bone folder (and score board if you have one)
-         Papers to decorate

Start by cutting both your pieces of cardstock into a square. The size of squares you use will be the size of the finished card. I have used an 8”x8” square but you can use any size you like as long as all the sides are the same.

Then cut your squares in half. This meant I ended up with 4 pieces measuring 4”x8”.
I have used 2 different colours so you can see how to put them together.


Now you need to score each piece. You will do 3 score lines on each.

With your card lying horizontally you will be scoring at both ends.
To work out where you score use the diagram below.

The 2 end pieces equal the size of the middle piece.


So if you are using the same size as me then you would score 2” in from each end, leaving a 4” space in the middle. If you are make a 6"x6" card then you would score 1 ½” in leaving a 3” space in the middle etc.


Then turn your card 90º and score at halfway point – 2” on mine


Now it is time to stick your squares together.

Lay down your first piece and place glue just in the left and right hand corner squares.
Now take another piece and lay it on top 90º to the other piece.
Repeat adding glue to just the outer corner squares until they are all stuck together.


I would recommend using a glue stick as this way you have a little time to adjust the card to make sure that all 4 pieces line up exactly.


You now have the basis of your card!
To make it fold easily you will need to go over each score line. Go through the different folds of the card and press down each scored fold with a bone folder.


Once your card is folding easily you can now decorate!
For mine I used the new Chalkboard Collection pack which has 8x8 papers so they fitted my card perfectly and some Woodware flower stamps.


I hope you have enjoyed this tutorial and if you make a never ending card we would love to see. Feel free to share links below or on our Facebook Page :)

Happy Crafting,
Maxine xx


Wednesday, 22 April 2015

Waterfall Card Tutorial

Ok, ok I know it's supposed to be tutorial Tuesday but we can have tutorial Wednesday for once right?!
Sorry I didn't get the tutorial up yesterday, I was waiting for some new stamps and papers to come in to make this project, and gosh am I glad I did wait! I absolutely LOVE the new stamps and the papers are gorgeous *swoon*, just look at the prettiness!

So today we are making a Waterfall Card.


You will need:


- Card Blank (or you can fold your own with the white card)
- Patterned Paper and matching coloured card (I used the new Chalkboard Collection Pack)
- Brads x2 (or you can use eyelets)
- Ink pads (I used Memento Black ink to stamp my flowers)
- Glue 
- Optional flowers for decoration

If you are using stamps then start by cutting yourself out 4 or 5 squares of white card. Mine were about 4.5cm. Stamp your images onto them. I also inked the edges of my squares but this is optional.
If you are using die cuts or stickers then you don't need to do this step, as you can see I used stamped images and 1 die cut. 


Now cut yourself 5 squares in your coordinating coloured card. These will want to be approx 0.5cm bigger than your white squares. Or if you are using die cuts or stickers then they will want to be just bigger than your shapes, but make sure they are square! Stick your stamped images/die cuts to the coloured card.


Cut yourself a new piece of white card the full long length of an A4 piece and the width of your squares. So mine was 5cm wide by 29.7cm long.

Measure up from one end the size of your square and mark it. This is where you will put your first score line. Then you will make 4 more score lines 1.5cm apart.


Now you can start to glue your squares to the scored length of card. Add one square to the bottom so that it covers the whole space. Then you want to add some glue to each of the 1.5cm sections and adhere just the top of the squares. 


Get your card blank (or fold yourself one with some more white card, mine measured approx 10cm x 21cm) and decorate the front. I have used another piece of pink card and some patterned paper.

You will also need to cut yourself a piece of coloured card the width of your card by 1.5cm. So mine was 10cm x 1.5cm.


Attach the extra piece of card to the front of your decorated card using either brads or eyelets just at the edges. You will need to leave the middle of the piece of card unstuck so you can slip your waterfall part through it. You need to place it so that the waterfall has enough room to sit above it. Mine was approx 1/3 of the way up from the bottom.

Now adhere the bottom of the waterfall part to the piece of card you just attached and fold the top part of the white card back and under the strip.
You can now pull on the white card that comes out the bottom to make sure your waterfall works. 

Now all you have to do is trim down the white card pull tab to a length you are happy with and add a flower or other embellishment to finish it off.

All done :)


I love how effective and fun waterfall cards are and I hope you do too. These cards are especially good for children. Have fun and if you make a waterfall card we would love to see. Feel free to share a link here or pictures on our Facebook Page.

Happy Crafting,
Maxine xx

Wednesday, 26 March 2014

Card Making Demonstration

I'm super excited to let you know that we are going to be having a (free) Card Making demonstration in our shop :)
If you are local to Trowbridge, Wiltshire then please do come and join us! 


Saturday 29th March 2014

10am - 4pm

A fab designer from docrafts will be joining us to share with you lots of projects, tips and techniques using the new products from docrafts!

I really can't wait :)


So what are the new products from docrafts you ask?
These 3 new collections - Gorjuss, Bellisima and Oyster Blush include papers, stickers, decoupage, stamps, ribbon, kits, trims, embellishments and more!


And if you are stuck on what to get then we have a fab Goody Bag that contains a selection of all the collections at a fantastic price of £15, which is over 50% off the RRP!!

And if that wasn't enough there is also a magazine that as well as containing free gifts has stacks of inspiration and projects using the new products!


If you are unable to join us on Saturday or you live too far away then you can still check out all these fab products on our website, just click on the pictures to be taken to them!

Happy Crafting :)

Wednesday, 5 March 2014

Lots of new goodies!

Lots has been happening at Creative Hobby Supplies this year. We have oodles of new supplies in stock and I have been juggling the stock to try and make room for it all! Today I am going to share with you some of our new stock from Crafter's Companion.

Spectrum Noir Pens
Have you come across these pens yet? 
They are professional high quality alcohol pens which give fantastic results when used on stamped images.
You can visit the Spectrum Noir website for loads of tips, tutorials and techniques for using these pens - http://www.spectrumnoir.com/

Spectrum Noir pens are alcohol ink based markers which have been designed specifically for crafters, but these affordable markers are also great for beginners, students and hobby artists alike. Each pen is double-ended, with a broad chisel nib for large area fills and a fine bullet tip for detailed work.

  • Achieve effortless blending and colour matching.
  • Alcohol baseds ink for perfect results.
  • Acid-free and non-toxic.
  • Two nibs in one pen.
  • Each pack colour co-ordinates perfectly.

Each pack contains six colour-themed Spectrum Noir Marker Pens in blendable shades, so from a single set of pens you will always have colours which are perfectly co-ordinated and work together. Spectrum Noir marker pens are available in 168 colour shades including a colourless blender. The colours blend seamlessly, and can be mixed or layered over each other. For stunning results use with Neenah Classic Crest Card, this is perfect for use with alcohol based pens.
These fast drying, alcohol based markers are acid-free and non-toxic, and the coloured ends of the pen allow for easy colour identification. The image colour has been reproduced as accurately as possible.

These Spectrum Noir Makers have an ergonomic hexagonal barrel which has been designed for greater comfort when colouring. Each of these markers also has a unique non-slip rubberised grip.

You must check out the Spectrum Noir website to see the amazing results that can be achieved with these pens.

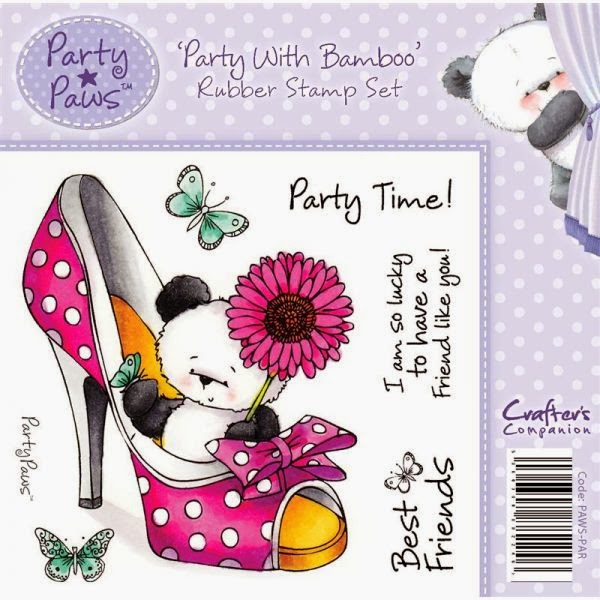
Also from Crafter's Companion we have received in some lovely stamp sets. These stamps can be used with the Spectrum Noir pens to give some beautiful results.


These are super cute images of Bamboo the panda and would make cards suitable for many occasions.

Check out these amazing examples created by the Crafter's Companion Design Team:


We also have a few other stamps from the Bebunni and Makey Bakey Mice ranges, plus EZ Mount for mounting these stamps and Neenah card for stamping onto. All our Crafter's Companion products can be found on our website here. 

Happy stamping and colouring!
Maxine

Wednesday, 10 July 2013

Creativity Craft Event

Wow hasn't the weather been glorious of late? However I have found myself not crafting due to being out and enjoying the weather while it lasts which is a bit of a shame.

This coming weekend though Creative Hobby Supplies will be attending our local craft fair - Creativity, in the Civic Hall in Trowbridge, Wiltshire. It will be our first 2 day event and I am really looking forward to it, although trying to decide what to take and organising the stall is harder than I imagined!

We have recently had some new bits and bobs into stock of which I will be trying to take to the fair with me. These include Indian Glass Chips and Beads, Large Resin Flower and Butterfly Charms, Washi Paper Tape,  more Card Candi, Pearl Card and Scalloped Card Blanks.


I am just in the process of creating some examples to take with me to the fair using some of our products. While this will mainly be cards as they are easiest to display I will also be taking along some jewellery pieces and of course our jewellery kits. 

If you are in the local area it would be great if you could stop by and see us, if not all our products are as ever available on our website. www.creativehobbysupplies.co.uk

Hope you are enjoying the weather wherever you are and happy crafting,
Maxine